Technology Thursday is a weekly linky dedicated to all things technology related. Share reviews of websites or apps you've tried, tech tips that make your {teaching or personal} life easier, and helpful tutorials. Our hope is that this linky provides a place for teachers to share and learn new ways to use technology and engage students!
Be a rule follower!
Rule #1: Include the image above and a link to our blog somewhere in your post.
Rule #2: Be a good blog reader...visit the two blogs who link up before you and leave some love on their pages!
Rule #3: This linky is not intended for product promotion. You may include products you've created in your posts, but they should not be the sole focus of the post.
Do you love task cards? Today's PowerPoint potential post is all about how you can make a template and use some grouping and aligning buttons to make task cards. I will first show how to make a template so you don't have to do the layout for them EVERY SINGLE TIME! So here goes... are you ready for picture overload???
First things first. Let's make a template for those pesky task cards. I use task cards for a variety of things in my classroom. They are a center, they are part of my whole group lesson, they are an extension activity for my high thinkers, they are part of a review before a test... it is task card heaven in my classroom. I love how versatile they can be. They are also easy to differentiate with. Usually when I make sets of cards, the beginning task cards are easier and they progress in difficulty. The task cards all look the same and my kiddos have yet to catch on that they are different levels. I just assign specific cards to specific kids. :)
The first step in creating a template is to open a new document. I have "empty/blank" templates saved already that are sized to allow for margins (i.e. 8"x10" and 10"x8"). Then you will want to create a table. The number of task cards per page can be changed by just adding more columns or rows to your table. I have found that 4 per page is convenient.
The reason I have started using a table as a guideline for my task cards is because it allows for fewer cuts. Some sellers/teachers create task cards with a white empty space between the task cards. This empty space does not sit well with the perfectionist in me. I would spend at least an extra 2 minutes per page to cut off all that white on the edges. Super time consuming. Anyways... next step is then to drag and reposition your table so it is on one of the corners. Then drag it so it takes up the entire page.
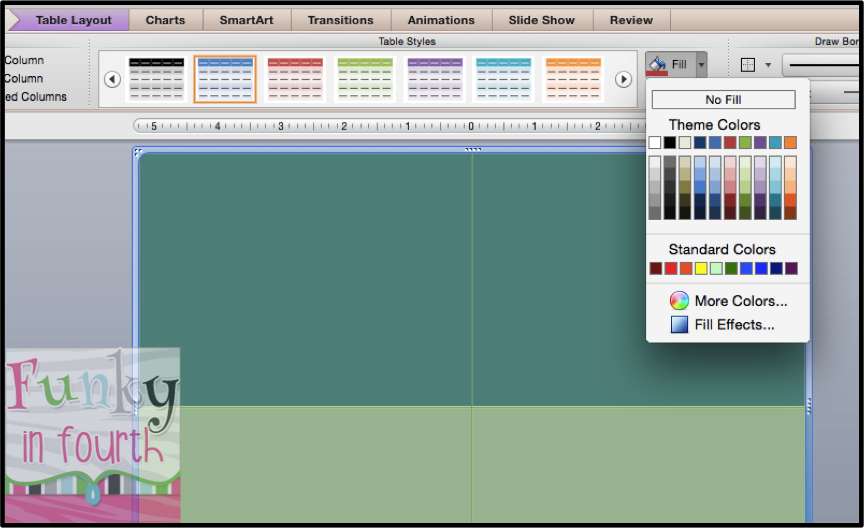
Now maybe your opinion about the blue background is different than mine... but I HATE IT. Quick fix. Select all your boxes by clicking in one and then dragging all the way to the opposite bottom corner. Then go up to "fill" under your tables button. Click on fill and select no fill. This will make your background transparent! Wahoo!
We are almost done with the template, I promise. Next step is to change the lines so that they are just guidelines for your work. For my template the lines are gray, but then with the example of task cards I will show later, I just changed the template table to have white lines using the same steps. There are tons of options under the same table button you were just in with the previous step. If you click the line on the right side you can change the thickness, type of line (dashed, dash space, full line, double line, etc.) and also the color. The great part is you can make the lines on the outside of the table not be there! This makes the inside lines only guidelines for the cuts and your outside guidelines becomes whatever background you choose.
The trick is to click on your line choice, color choice and then select the lines that you wish to be available by clicking the little grid above the pencil. You can mess around with the options until you find one that works for you.
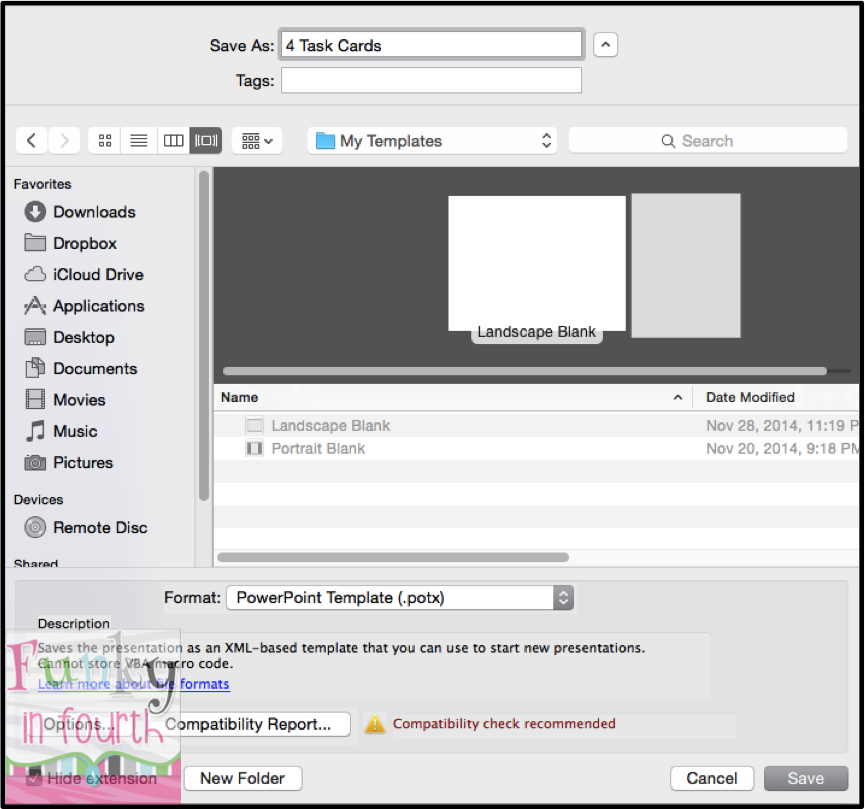
The last step is to save this as a TEMPLATE. That way you don't have to redo everything you just did every time you make a task card set. You just open this template and ta-da... it is ready for you! So do your normal file, save as step and title it something that you will know what it is. I titled mine 4 Task Cards just to show you an example. Then you want to select the file type as a PowerPoint Template. It should automatically switch to find the folder "My Templates" so double check that at the top. If it doesn't automatically switch, then do a search for that folder before you save. Having your template saved in that folder is what makes your template show up when you first open PowerPoint.
Now that we have a template saved. Go ahead and close out of PowerPoint completely and reopen it. Your new task card template should show up right there when it first starts. Select it and you your new file should pop up looking similar to this (it might be slightly different depending on what features you chose with the lines).
This is where the fun begins! Find a fun background that you absolutely love. I am officially obsessed with Kristen's Nautical Cheer Digital Papers set. Drag or insert your image into the new file. Don't worry... your template is still blank. When we get done, we will save this as a new file and the template won't be changed at all. Resize your background so it fits your page.
Then make sure your image is selected and click on the format picture tab. Then click on the arrange button. A list of options should pop up including send to back. Click it and your background that you inserted will reorder to the back behind your table template. This is why we set the fill to "no fill" when we set up the table.
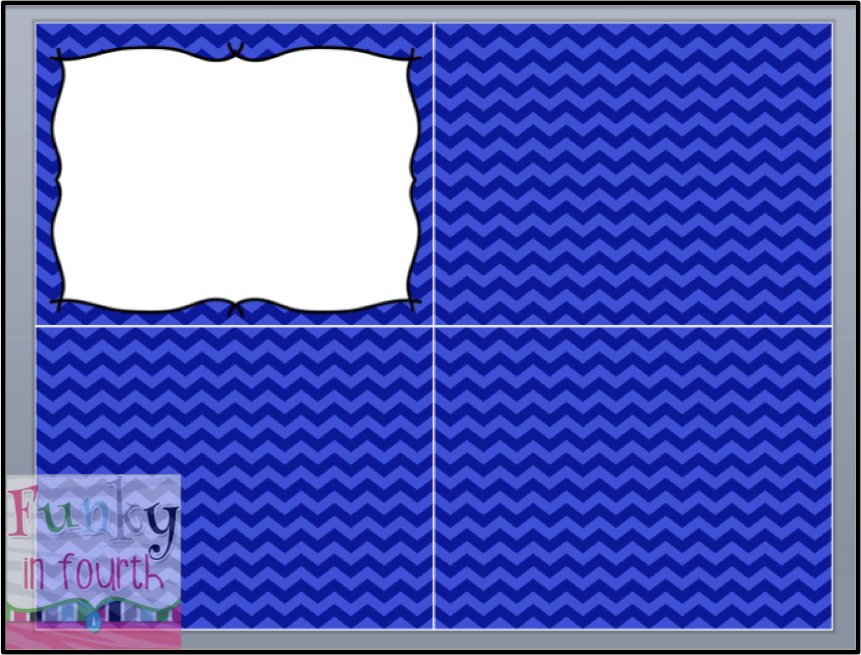
Your gridlines from your template should appear (remember they will be whatever color your template was set up as). You can change the color of the lines by clicking on your table and going to the table tab and then selecting the color/line options that you desire. Now drag in a frame/image with a white background. I used Lovin' Lit's Huge Seller's Toolkit Bundle. Resize the frame to fit inside the gridlines of your table.
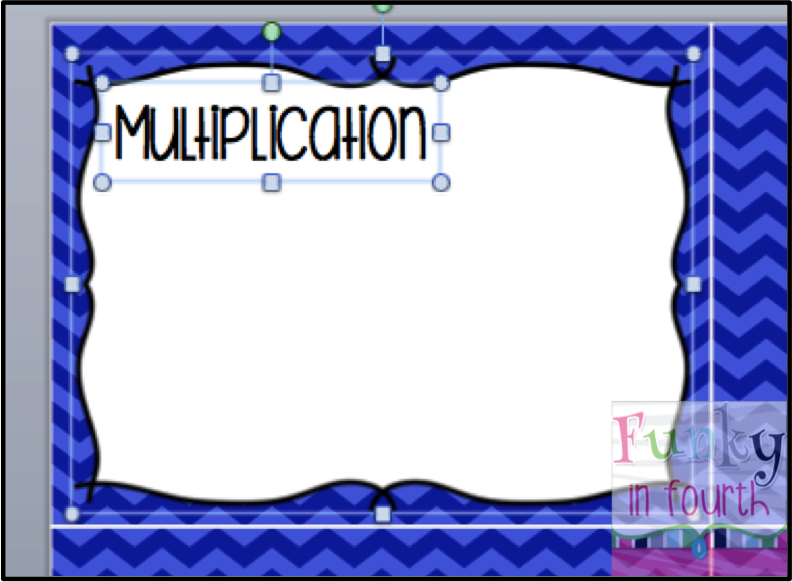
Next add a text box. I try to get it kind of where I am going to want it to be... but I am not perfect. I also don't worry about if it is in the center or not. We will use some fancy settings to make sure that it is. The next image shows the text box that I created. You can tell that the text box is not centered with the frame. That is totally okay. You can also tell that the gridlines are definitely white. Sometimes you have to change the color so that they show up on the background. If you have a predominately gray background, you don't want gray gridlines! Once you have your main text box on the frame, select both the text box and the frame (use the shift key to select more than one object).
Once you have both objects selected, go to your format tab again and go to the far right side. Click on the button that says align. A variety of options pop up and you can select align center. This will move the objects so that they are centered. Please note: this does not mean that they will be centered in your table! They are only centered to each other. You will need to adjust their exact location on the page.
Your next step is then to group these objects together. That way, whenever you move them... the alignment stays centered. Add in the other graphics, text boxes, features, etc. that you wish and you should have a task card completed. Select all of your items that you just added and the original frame/text box group and group all of the elements together. Copy and paste this new group so that you have a task card "layout" in the next box.
Next super easy step is to get them to line up. Select your two task card "layouts" and go to the format picture tab and then select align. Scroll down to align middle so that the middle of your task cards are now aligned. If you don't have the second layout close to where you want it, it might move both of them (one up and one down). If this happens just drag them up a little so they are in the middle of your table box.
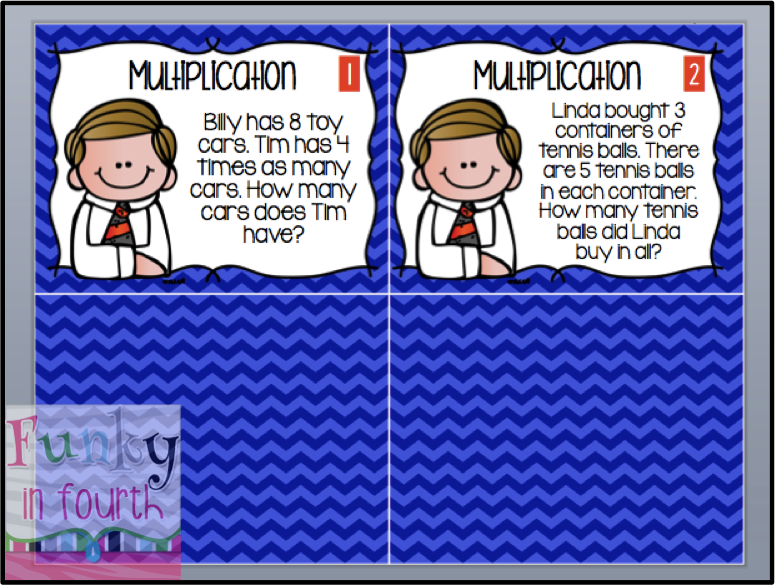
Repeat the last step to get two more task card layouts on your page. As you can see below, I have moved the second set of task cards so now they are all lined up and perfectly aligned. I also changed the text to make 4 different task cards. You can use those align buttons to align to center and align to middle.
And there you have it... using PowerPoint to make a template for task cards and making a page of task cards. Simply select all, copy and paste onto a new slide to add more cards. Make sure you save this file as either a pptx or pdf instead of a template. No more annoying white line of image free space in-between the task cards. 6 simple cuts and you are done!
I hope that these tips/tricks help make task card creation a little bit easier for you and your classroom. Make sure you link up below with your awesome tech tip for the week!









I will definitely be coming back to this post the next time I make cards for stations or task cards. Thanks for the step by step instructions and photos.
ReplyDeleteBrynn Allison
The Literary Maven
Now I feel silly that I have been making task cards the long way this entire time!
ReplyDeletewww.erintegration.com
Thanks for all the great tutorials Cassie! Tech Thursday is my favorite! I'm all about that tech ;)
ReplyDeleteThanks so much for the post. This really helps me. I have made task cards before and yes...I am one of them with white in the middle...but because of you I am a new woman! I appreciate all the great tips!
ReplyDeleteRenee at The Science School Yard
This is a great tutorial! Thanks much
ReplyDeleteOh my word!!!!!! This post and tutorial is a GIFT! Thank you so much for taking the time to lay it all out like this. A whole new world just opened up! Thanks again.
ReplyDeleteThank you for this tutorial. It makes me excited to get my French 3 pack done so that we can use them tomorrow. :)
ReplyDelete