Showing posts with label Classroom Tips. Show all posts

Tuesday, September 15, 2015

Glue Sponges to the Rescue!


Raise your hand if you have a love-hate relationship with glue sticks. I know I do. Let me break down my relationship for you...

What I Love About Glue Sticks:
-Not as Messy as Drippy-Drop Glue
-Students Don't Use Too Much
-Easy Storage
-No Curly Edges on Pages
-Sticky Fingers... Not So Much
-Less Likely to be Eaten... serious.

What I Hate About Glue Sticks:
-Spendy
-Don't Last as Long
-Dry Out Quickly
-Difficult to Glue Little Pieces
-Not Always Sticky (brand-to-brand)
-Need Something to Glue Against

Now that I have hashed out the nitty-gritty for you... I hope that you are not having a full blown panic attack thinking about those glue sticks you have in your classroom. Keep on reading for the solution that you won't regret trying in your classroom!
Maybe you have seen these glue sponges lurking around in the bloggy or Pinterest world. Trust me, I was skeptical at first too. I thought it would make a mess, my students fingers would get all gluey and they would be a complete waste of time.

I WAS WRONG.

First, I picked up my materials. Sponges and Plastic Sandwich Containers. I already had a bunch of drippy-drop glue in my classroom so I was set.
Each glue sponge requires a container, a regular sized sponge and one normal size container of glue. I have tables in my classroom so I have three students who share a glue sponge. I made 7 for my classroom and one for my office too!
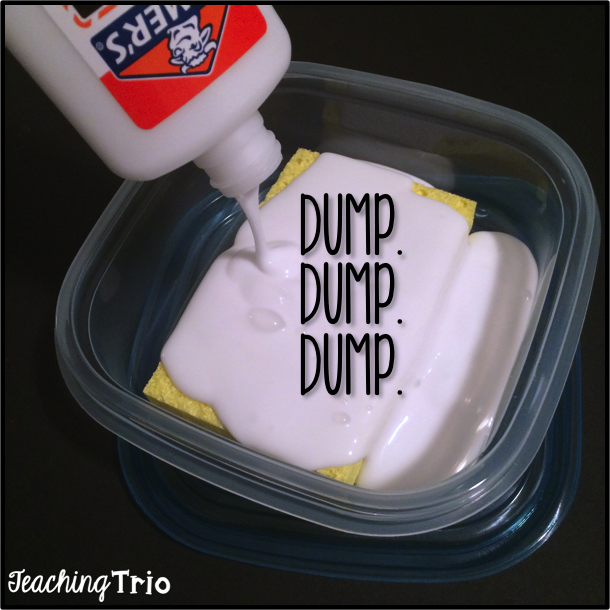
Place your sponge in the container and pour the glue out of the bottle. It takes a few minutes to let all of the glue drip out of the bottle. Then cover and let it sit for 24 hours before using.
Repeat the steps for as many glue sponges as you need. Let all of them sit for 24 hours before trying to use them with your students.

To use, students simply swipe the paper on the sponge and BOOM- stickiness.

Ready to try out glue sponges in your classroom? Here are a few more tips:
1. Make sure you teach your students how to close the containers all the way. If they are left open- they could dry out before you find out.
2. If the top of the sponges start to get dry you can spritz with a bit of water to renew it.
3. Purchase containers that are sturdy. Don't go with the cheapest option. You will want to use these again and again. The lids of cheap containers tend to break and then you are out of luck.
4. Take the time to set up expectations and your rules when you introduce them to your students- you won't regret talking through the little details before you unleash the power.
5. Have a few bottles of drippy-drop glue on hand, I like to add a bit of glue every now and then to make sure they are going to be nice and sticky when my students go to use them.

Are glue sponges the answer you have been looking for?!

 photo Signature-CASSIE_zpsaxxtaak1.png

Thursday, July 23, 2015

Growing a Healthy Classroom Mindset


You know how you browse the internet while mindlessly watching something on T.V. Well one day I happened upon a video. That video really caught my interest. I just couldn't shake some of the things the lady said. That video led me on an extensive internet search. I just had to find out more. That video then led me to a book. And eventually led me to a change in my thinking about my students, my teaching, and myself.

The woman speaking was Carol S. Dweck, Ph.D. And the title of the video was "The Power of Yet". She was teaching on mindsets - the fixed mindset versus the growth mindset. And what she was saying shook me to the roots of my being. No joke. It was like a classic AHAAAAA! moment. To summarize: fixed mindsets lead to failure and growth mindsets lead to success. Even briefer (use your best caveman voice)- fixed mindset "bad" and growth mindset "good". When I reflected upon myself, I realized I had a mixture of both mindsets. In some areas of my life, the growth mindset is absolutely embedded in my way of thinking. But in other areas, the fixed mindset ruled.

Here is a graph to help give you the basics of each mindset.


I couldn't help but connect what I was learning about mindsets with my Christian beliefs. It actually fits right in with God's way of thinking. The word is filled with people that were chosen to become more than what was expected of them. Examples are David, Gideon, Joseph, Esther, Ruth, Peter, and Paul. God helped each of them rise above their circumstances of birth. One of my favorite verses is Philippians 4:13, "I can do all things through Christ who strengthens me."  My question is, "Why have I not been applying this to every area of my life?"

I also started thinking about my students and their mindsets. I see so many students that fall into that fixed mindset category. They give up so easily. They don't try new things. They back away from challenges. How can I help them?

I came up with a plan- start the year off training my students in the growth mindset. I plan to teach my class about each mindset and why we need to have the growth mindset. I also want to instruct them in what I feel are the "tenets" of a growth mindset.

Of course I created a product to help!


Growing a Healthy Classroom Mindset is designed to cover at least 20 days of instruction. Teachers introduce the basic knowledge concerning mindsets and brain research. They then present a growth mindset statement each day. Discuss the statement and what it means. As each statement is covered, add the accompanying poster to a bulletin board to create an inspiring display that can be referred to throughout the year. Introduce concepts with a PowerPoint, posters, and student handouts.

Growing a Healthy Classroom Mindset!


 Here is Dweck's video that started my journey.


If you would like to know more, here are a couple of links to articles about Dweck's research and book, Mindset: The New Psychology of Success.

Educational Leadership: The Perils and promises of Praise
Scientific American: The Secret to Raising Smart Kids

What mindset are you?


Friday, March 20, 2015

5 for Friday: Finally Spring!


After a very cold and snowy (for this area, anyway) February, it is finally SPRING! I don't know about you, but I am so happy that it is beginning to warm up, and we are able to go outside during the day. Here are five ways to get your class outside, while still learning.


Read!

Warm spring days are perfect for heading outside to read. This week, we spent time outside reading chapters of our current novel, The Westing Game. The kids loved getting out of the classroom, and were focused and engaged the entire time, even though we were outside. Whether you head outside for a book club, read aloud, or just Read to Self time, reading is the perfect outdoor activity.

Take a Walk!

If you're in the early grades, it's pretty easy to justify a Nature Walk with your class. (I miss those days!) But if you're like me, and teach in the upper elementary grades, it's a little harder to tie a Nature Walk in with your content standards. Fortunately, this is where The Walking Classroom comes in! If you haven't heard of them, this is a company that makes mp3 players loaded with standards-aligned educational podcasts for fourth and fifth grades. We haven't gotten started yet this year, but last year, my students LOVED our daily walks around the neighborhood. The mp3 players are quite expensive, but they have some amazing donors and frequently have grants available for class sets!


Hello, Science!

There are so many ways to make science more fun by teaching lessons outside! One of my favorites during our Force & Motion unit is the Water Bucket Experiment. (There's no way you'd ever get me to do that one inside, anyway!) Of course, everyone loves a good Vinegar & Baking Soda Volcano for teaching chemical reactions or Bottle Rocket Launch. Think through what you're teaching in science, and try to get out for as many activities and experiments as you can!

Do some Math!

It's easy to come up with ways to get outside during reading class, but it is often harder for me to remember to incorporate outside learning time into math or other subjects. Any time you have planned a lesson that is mostly student practice or exploration, rather than lots of teacher-directed instruction, you can easily do this outdoors. Give everyone a clipboard, toss your manipulatives in a basket, and head outside! I teach math first thing in the morning, when our playgrounds are usually empty, so we often sit on the rubber mat and the playground equipment to do our math practice. 

Bribe them!

Last, but not least, every teacher knows the value of a good bribe, especially during these last, trying, months of school. Whether you do Teacher vs. Student, or the more traditional "O-U-T-S-I-D-E" letters on the board, extra recess time is the #1 choice in whole class rewards for the spring! After being cooped up all winter, my class will do just about anything for a little extra recess time at the end of the day!

How do you incorporate some outdoors time into your school day?


Thursday, January 29, 2015

Easily Share Links with Students: Tech Thursday {1/28/15}


Technology Thursday is a weekly linky dedicated to all things technology related. Check out our Linky Parties page for details on how to link up!

Today, I'm excited to share with you how I manage the links for all of the websites we use in my classroom. I don't know about you, but I use a TON of different websites in my class. More often than not, my students need to go to our specific login page, which can be tough to relay to students, since it's usually a pretty long URL.

A few years ago, I learned about a site called PortaPortal, and I was so excited to have a place to save all of the classroom links we use so that my students could just find the right one and click. There was one downside though... I didn't love that the links were text only, when so many of my students are visual learners. 

Enter Symbaloo...

Symbaloo is a totally free site that allows you to save your favorites as icons - much like the smartphone and tablet icons our students are so used to using. 

Symbaloo is easy to set up and add links. Just click an empty tile, paste in your link, and click save. It will even try to automatically pull an image for the website's icon! If you want, you can also edit the title of the link, select an image for the icon, and choose a background color. 

If you need more room that what's shown, you can add more boards or add extra rows and columns to the board. 

The only downside to Symbaloo is actually the fact that it is so easy to move, edit, or delete tiles. This is a great feature for my boards, but it can be a problem in the classroom with students who *occasionally* make mistakes on the computer. Don't worry though, I have the solution for that too!

Weebly...

Weebly allows you to create a totally free website with zero ads and an easy to remember URL. It's super easy to set up a page using their templates, and then embed your Symbaloo page onto it. This way, you can easily update in Symbaloo, and also give students access to links in a format that they can't accidentally delete! 

If you're thinking that you can't make a website, think again! I'm going to walk you right through how to create your site and embed the Symbaloo boards onto it. It's easier than you think!

First, you'll need to select a type of site... 

Next, choose a theme. You will be able to change this later. I recommend looking for a simple layout with wide text areas to allow room for your Symbaloo boards. You can change colors on many of the themes, and can even add your own backgrounds to some. 

Now, it's time to choose your domain. Make it something simple for your students to remember. (Mine is doyle5.weebly.com) There's no need to purchase a domain unless you just want to. 

From here, it's all click, drag, and type! Edit text and images by just clicking on them. Add features by dragging from the left sidebar into the page.  If you have a photo heading like the one shown, and don't like it, you can remove it easily by clicking Pages at the top and changing the page layout to one with a smaller picture or no picture. This is also where you can also add or delete pages.

Embedding your Symbaloo board:
First, on Weebly, drag the "Embed Code" button onto your page wherever you would like it to appear. 

Next, head back to Symbaloo. Click the Share button at the top of the window, and you will see a popup like this: 
Decide if you want it shared publicly or privately (I choose private). Click Share my Webmix, and click Embeded Code. You will see a small popup with a box full of html code. Don't get nervous... they've already done all the work for you. Just select all and click copy. 

Back to Weebly. Click in the box that says "click here to edit custom HTML" and paste in the code you just copied. Click outside the box and watch your Symbaloo board appear! Done! 

I actually keep several different Symbaloo boards going on my site at one time. Feel free to head over and see how it works! My favorite part is that students have easy access to the sites we use at school no matter where they are, as long as they remember the URL. (Which I have printed on labels inside the front cover of their agendas... no excuses, kiddos!)

Students and parents have loved that they can access things so easily and only have to remember one website instead of dozens. I even use it at home to access our classroom sites! (And you might notice that my old PortaPortal site is still there... it has oodles of links that I haven't moved to the Weebly site.)

You can use your Weebly site just as a homepage for your students to jump to other websites, or you can make it a full-fledged classroom website easily with their click & drag interface. I can't say enough about how easy it is, and how much you can do with it! (I am in no way affiliated with Symbaloo or Weebly, I just love their sites!)

So... what technology have you been excited about recently? Link up below and share with us!


Saturday, November 15, 2014

Bright Ideas Round-Up!


Welcome to the November edition of the Bright Ideas Link-Up! This one is a special one! Over the past 10 months, teachers have shared thousands of great ideas through our monthly Bright Ideas event. This month, we’re re-capping all of those great ideas, just in case you missed any! Below you will find some of my bright ideas from the past several months:

We shared some great ideas for using dry erase... off of the whiteboard... You can check it out here.

In August, we shared three of our favorite back to school tips...
We shared how highlighters have saved our sanity...

A simple trick for decluttering your computer area...
 

And an easy way to help students remember all of their passwords...

I hope that you’ve enjoyed these bright ideas, and that you have found an idea that you can use in your own classroom. Be sure to check out the link up below for tons more bright ideas from my friends!


Tuesday, October 14, 2014

Tried it Tuesday: The 5 B's


Today I'm linking up with Holly at Fourth Grade Flipper for Tried It Tuesday. 


Tired of your students running up and telling you every little thing? Trouble with tattling? Do you have students that need a Band-Aid for a teeny-tiny speck?

Teach your students the 5 B’s!


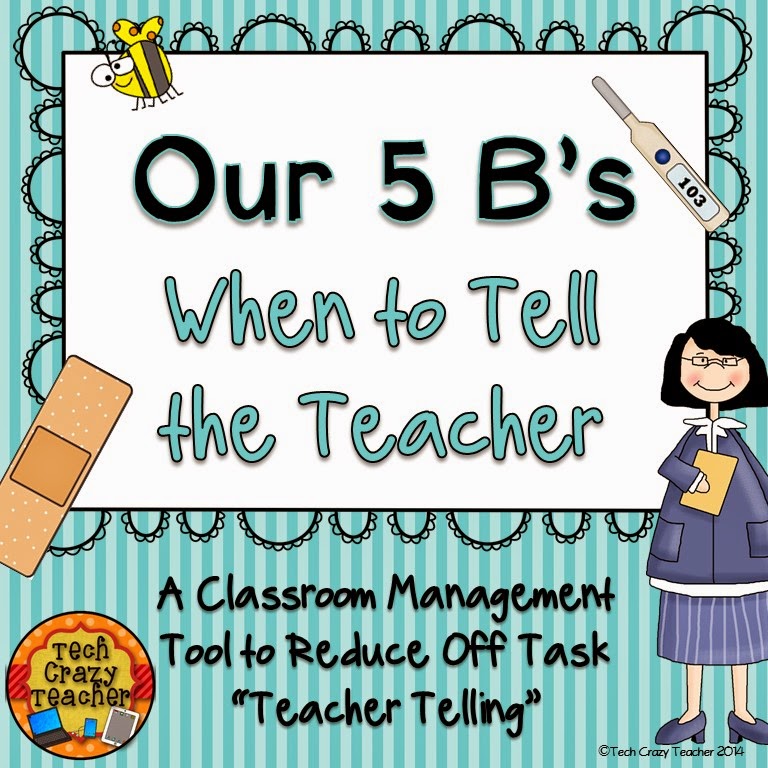
The 5 B's is a classroom management tool meant to reduce off task "teacher telling" and tattling. The 5 B’s help your students know when it’s appropriate to go to the teacher and what things a teacher needs to know about. What are the 5 B's? The 5 B's are Bleeding, Broke Bones, Being Sick, Bee Sting, and Bullying.


I start this at the beginning of the year, but it can be started at any time. I literally teach my students the 5 B's and what they mean.  I always give them examples such as a teeny speck on their finger that really really hurts but doesn't need a Band-aid or a bee sting is different from spotting a bee.  We review the 5 B's every day for the first week of school (or the first week you introduce it).  

As the year goes on, you can just refer back to the 5 B's.  When my students come up to me at recess, for example, I hold up my 5 fingers and ask if what they are about to say is one of the 5 B's. Most of the time, they just go back and play. Fabulous!


I have used this for a number of years and in a number of grades.  It works!  

Check it out at my TPT store!

Let me know if you have used something similar! 


Saturday, September 20, 2014

Bright Idea - Dry Erase... Not just for whiteboards!


We're so excited to be lining up again for this month's Bright Ideas Blog Hop!


Tired of the printing, laminating, and cutting cycle that never seems to end?  I can never keep up! Distressed with the wasting of paper making task cards and group lists and copies?  Don't have room for a dry erase board to demonstrate math and reading tasks for small groups?  We have a great tip for you!


Dry erase is NOT just for whiteboards anymore!

There are a number of ways to use dry erase markers that don't require a dry erase board.  All of these work great in our classrooms and save paper; but more importantly, they save TIME.

Dry erase wall dots (you can find them on Amazon) or plastic place mats can be used when you need to illustrate something at your small group table.


Reusable dry erase pockets are a great way to post items on a bulletin board.  Cut off the top flap if it has one, slip in a background paper, and write away!


Here is a plastic plate hot glued to my closet door for Math Workshop.  It is super easy to write on again and again.


Give pocket charts that have been gathering dust in your closet a new life.  Just place a background paper behind the plastic and write and wipe.  These are used to give choices for Math Workshop.

 Dry erase has come off the board and into the classroom!

If you enjoyed this Bright Idea, please consider joining us on Bloglovin, Facebook, and Pinterest for more great ideas, tech tips, and the Sunday Scoop!


    An InLinkz Link-up