
Showing posts with label Organization. Show all posts
Showing posts with label Organization. Show all posts
Friday, July 17, 2015


Monday, August 18, 2014
Classroom Must-Have: a Teacher Toolbox (or 2!)
As we begin a new school year, many of us are looking for something new that makes our teaching lives easier. A few of my fellow Tennessee bloggers have joined together to bring you some of our classroom must haves, just in time for Back to School! For a little added bonus, we are also offering one lucky reader a Winner's Choice item from each of our TPT stores, so don't forget to enter the Rafflecopter at the end of this post!


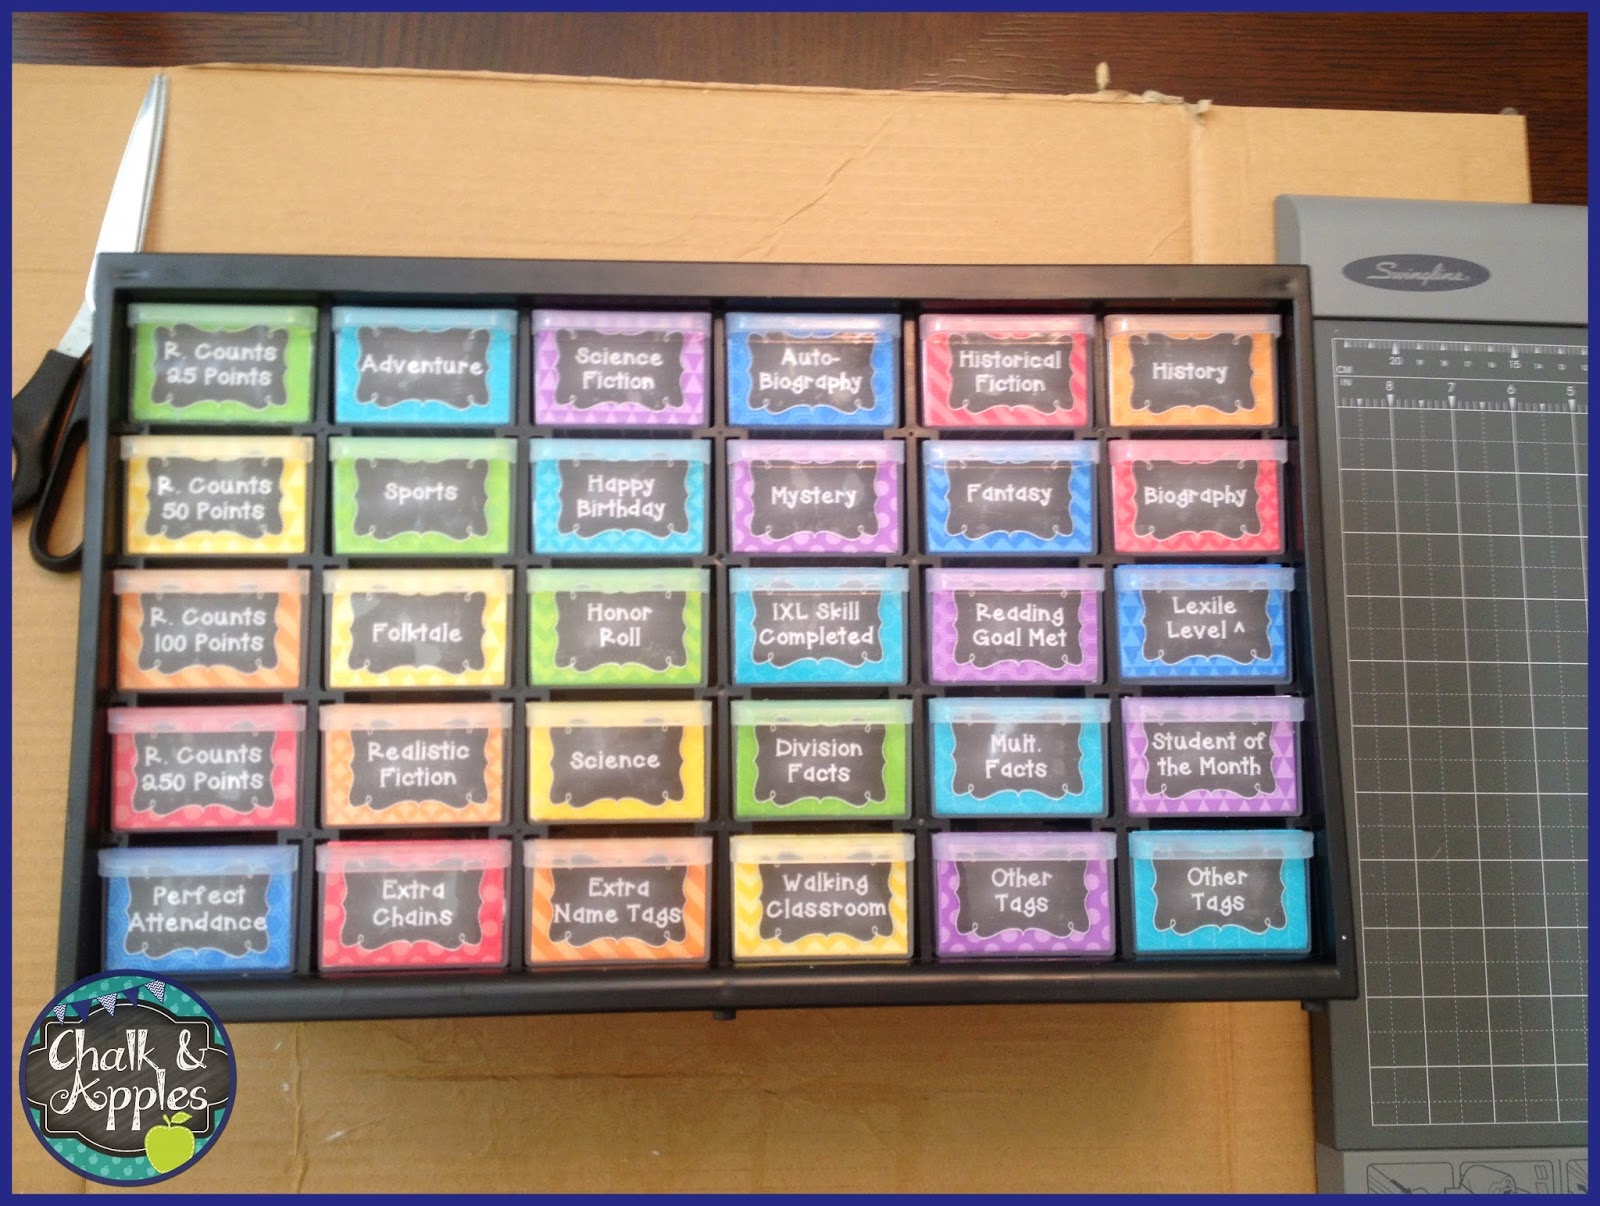
If you aren't familiar with them, the teacher toolbox is just a hardware organizer that you can buy at Lowes, Home Depot, or even order on Amazon. We teachers are using them to store all kinds of things... most commonly those office supplies that clutter up your desk!








a Rafflecopter giveaway

My Classroom Must-Have is defintely a Teacher Toolbox... or 2 of them! I first ran across the teacher toolbox idea on Pinterest a little over two years ago. I made my first one that summer, and have added a second this year.
If you aren't familiar with them, the teacher toolbox is just a hardware organizer that you can buy at Lowes, Home Depot, or even order on Amazon. We teachers are using them to store all kinds of things... most commonly those office supplies that clutter up your desk!
Of course, being teachers, we can't leave them ugly plain, so we all pretty them up in our own way! I spray painted this one turquoise, and used my Chevron label kit in it last year, but this year I changed it to my Perfect Patterns labels. (More about changing them in a minute.)
This one holds all of my brag tags for my fifth graders. I found it on Amazon, and it was already black, so I just went with it! You can find lots of different sizes & combinations of drawer types on Amazon now...woohoo!
In my opinion, the trick is to Mod Podge the labels onto the inside of the drawers. I did this last year with my Chevron labels, and when I wanted to switch them to match my Perfect Patterns classroom, they peeled right off! It was perfect!
A little tip for you...if you have an inkjet printer, mod podge will smudge the ink. BUT... you can eliminate this problem by spraying the entire page with cheap aerosol hairspray before you mod podge!
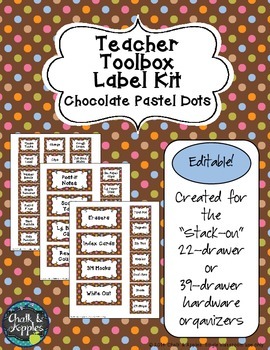
I now have 20 different patterns in my TPT store, and they continue to be best sellers. Just for fun, I'm making my latest Teacher Toolbox Label Kit a flash freebie now through Wednesday, August 20th! Click the link below to see all of the options and download the freebie!
Hop over to my friends' pages to check out their Classroom Must-Haves! Then, be sure to enter our giveaway for a chance to win your choice of items from each of our stores!
Since this is a Made-It, I'm also linking up for Monday Made-It at 4th Grade Frolics!
Saturday, August 16, 2014
Three Bright Ideas to start the school year
We are so excited to be linking up for this month's Bright Ideas blog hop! This hop is chock full of pin-worthy ideas to improve your instruction & make your teacher life easier. (And zero product plugs, we promise!)
.jpg)
 I cannot tell you how this idea has saved me. It is ...well, it left me speechless. I really don't know where the idea came from or who thought it up, but they are brilliant- genius even! And it is so simple! My friend, Lora, literally changed my teaching life when she shared this idea with me. Not joking!
.jpg)
.jpg)
 Not every school has enough money for wireless notebooks and tablets. My school sure doesn't! We still have our regular old computers. And until they go, we still have bulky headphones with lots of wires. A hot tangled mess that upsets my delicate teacher OCD! So the question is what to DO with the headphones. Do you put them on the monitor? On the chair? Lay them on the table? Each presents a problem.

.jpg)
This month, we are sharing three bright ideas that we love!
I will NEVER teach without doing this ONE thing EVER again! Interested yet? If you use this tip, you will never have nameless papers again! I promise. One word........... HIGHLIGHTERS!
- Buy some cool colored highlighters.
- Put them in a container by your turn-in tray.
- Teach students how to highlight their name before turning in their papers.
BOOM! Simple! I have done this for 2 years, and it so works! My students will literally walk up to the turn-in tray, get out a highlighter, look at their paper, and then walk silently back to their seat to put their names on their papers. It is almost enough to make a grown teacher cry.
Okay, okay...you do have to teach students not to "write" their name in the "pretty" highlighter colors or add rainbow effects to their papers. And maybe I have had one or two papers without a name. But I swear folks, you will never have to decipher whose "4" or "9" or whose handwriting that is again!
Here is a neat (pun intended) solution.
- Purchase some of the Command Adhesive Hooks (or something similar).
- Place the hook on the side of each monitor.
- Hang the headphones!
HA! Take that you warped wires of messiness!
 How many times have your students forgotten their passwords to the hundred different websites they have logins for? Mine forget all the time. I've seen a lot of solutions to use in class, but what about at home? With the increase in technology use at home (especially since I use the flipped classroom model in math), students need a reminder of these passwords at home too. Enter printable labels!

I just print these labels out and stick them in the front of each student's agenda. Then, as I introduce new websites, students write their usernames and passwords on the sticker. These are the 2"x4" Avery labels, and they're a great size for my needs. I decided after the fact that I wanted our class website on the sticker too, so I just used the small return address labels. (Oh, and next year, I'll proofread before I print, so they say ABCD instead of ABDC! Oops!)
If you enjoyed these Bright Ideas, please join us on Facebook (Kristen, Juliet), Pinterest, or any of the other links at the top of this page!
 &
&
An InLinkz Link-up
I just print these labels out and stick them in the front of each student's agenda. Then, as I introduce new websites, students write their usernames and passwords on the sticker. These are the 2"x4" Avery labels, and they're a great size for my needs. I decided after the fact that I wanted our class website on the sticker too, so I just used the small return address labels. (Oh, and next year, I'll proofread before I print, so they say ABCD instead of ABDC! Oops!)
If you enjoyed these Bright Ideas, please join us on Facebook (Kristen, Juliet), Pinterest, or any of the other links at the top of this page!
&An InLinkz Link-up
Thursday, August 7, 2014
Tech Thursday: Planbook.com!

Be a rule follower!
Rule #1: You must include the image above and a link to our linky somewhere in your blog post.
Rule #2: Follow the Rule of Three...visit the two blogs who link up before you and the one immediately after you and leave some love on their pages!
Rule #3: This linky is not intended for product promotion. You may include products you've created in your posts, but they should not be the sole focus of the post. {Exception...freebies...because everybody loves a good freebie!}

A little over a year ago, I tried something new...online lesson planning. Like most of you, I was used to writing down plans in a spiral bound lesson plan book. While that method is obviously time-tested, I've found that online planning offers some pretty impressive benefits when compared with the old standby. In fact, all three members of the Teaching Trio are loyal Planbook.com users!

Here are a few of our favorite things about Planbook...
1. Color code classes any way you want. Just because you skip the paper planner doesn't mean your plans can't be cute! Mine is a rainbow!
2. Attach files and web links for easy access. This is especially helpful now that our school doesn't allow USB drives or Dropbox! I attach everything I am using to my plans, even if I already have copies or I know it's on my school computer because...
3. View & copy last year's plans. Talk about a time saver! Obviously, I'm not copying an entire year over (although it's possible), but I do sometimes copy one unit that went really well. I love that I can use it to find attachments easier than hunting through all of my various drives too!
4. Templates save precious planning time. Enter all of those things you do over and over once, and never do it again! See my enrichment schedule at the bottom of the screenshot for an example.
5. Bump or Extend a lesson with 1 click. Planbook bumps all of your lessons forward or backward automatically when you do this. There's even an option to lock a lesson so that it doesn't get affected by a bump (for an assembly, etc.)
6. Share plans with teammates - My plans are shared with our SPED department so that they can easily see what's going on in my class, and we can plan together. Nikki and I were teammates the past few years, and we would often share our plans with each other. They are easy to import in when one of us had planned a special unit.

8. Common Core Standards already loaded. If you don't use Common Core (we don't), they will add them for you. Juliet had our standards added in a snap.
 9. Easy to follow tutorials for everything you could ever want to do!
10. Awesome customer service! They are constantly improving based on our feedback. This summer, they launched an iPhone app (iPad app was already available) and made several other changes based on teacher requests.
Now for the nitty-gritty. Planbook is not free, but it's cheap. $12 a year is less than most planners out there, for a lot more features. It's 100% worth it in my opinion. If you aren't sold yet, there's a 30-day free trial, no credit card required.
FYI - I am not recieving any compensation for this post, I just happen to love Planbook!
I did a short introduction to Planbook last year at my school, so if you are interested in seeing more of the ins and outs, check out the Prezi from my presentation!
Have you tried Planbook? I'd love to know if you love it as much as we do! Link up your favorite tech tips and website reviews below!

An InLinkz Link-up
Monday, June 30, 2014
Monday Made It: DIY Necklace Storage
It's Monday, so I'm linking up with 4th Grade Frolics to share a couple of Made It's.


Cut diagonally across the corners of the burlap.





I don't know about you, but my necklace collection has recently outgrown my jewelry box. They were taking over the entire dresser actually! (This is probably because of my Stitch Fix and Jane.com obsessions!) I searched Pinterest and found this adorable idea: Turn an old frame into a gorgeous necklace display. Instead of using one of the half-dozen frames we had lying around, though, I saw this one at Hobby Lobby, and had to have it! It matches our bedroom perfectly!
I can't wait to get it on the wall, but I'm going to have to, because this frame is HEAVY and I don't have any drywall anchors at the moment :(
If you want the how-to, keep reading. If not, scroll down, because there's one more made-it down there!
You're going to need...
* a frame (this one is 16x20)
* some cork (I used the 12x12 tiles, but you could also use the roll that they sell at Hob-Lob)
* hot glue
* burlap
* duct tape (of course!)
* nailheads or pushpins to hold your necklaces (I found aluminum push pins at Office Depot)
Here's what to do...
Take the backing out of the frame. Hot glue your cork onto it. Make sure you trim the edges close, because you'll need this to fit back into the frame!
Lay your frame back on top of your burlap, with the cork side down. Trim your burlap to 3-4 inches wider than your frame back.
Duct tape one side of the burlap to your frame. Then pull very tightly and tape the opposite side.
Keep working around the frame until you have it all taped down. Don't worry if your duct tape doesn't match like mine happened to...no one is going to see this!
Put you burlap & cork covered backing back into the frame, without the glass.
Now, just use your necklaces as a guide to push in your nailheads or push pins. Hang it, and admire!
Made it #2 is kind of a cheat because I designed it, but technically Zazzle made it. If you haven't ever looked at their stuff you should...or maybe not...because I spent *too* much money when I did :) You can upload your own images or search for ones that someone else has created and order them on tons of cool products.
I decided I needed a custom printed vinyl binder to use for this year's Teacher Binder. It arrived last week, and I couldn't be happier! These are quality binders, y'all. with my design and my name right on them! No more printing & trimming & never having the inserts fit quite right!
You might recognize that as the same pattern in my Perfect Teacher Planner from TPT. That's because I custom made it to match! I spent Friday getting pages printed and ready to go for the fall!
While I was at it, I also made one to match the Turquoise Dots planner, and Juliet has one on the way to her as we speak. I can't wait to see hers too!
Because I think these are awesome, and I want to give you a chance to try them...if you order a binder between now and midnight Thursday (7/3/14), I will give you the matching planner inserts for free! Just email me after you place your Zazzle order and let me know! (Link at the top of the page)
Happy Monday everyone!
Tuesday, June 24, 2014
Two-for-Tried-it-Tuesday
I'm linking up with both of my favorite Tuesday posts today... Teaching Tribune's Two for Tuesday and Fourth Grade Flipper's Tried-it Tuesday.


Here's a peek at what's inside... In the interest of keeping this short-ish, I'm just posting a little bit of each one. The overall binder is the same though, so if you see it in one set, it exists in the other one too. Download the previews on TPT to see a peek at every page!
Brand new: Rainbow Honeycomb Teacher Planner


Just updated: Turquoise Dots Teacher Planner


Both of these are on sale today only for just $5 each! Get a jump on next year's organization by grabbing one now!!

pretty easy really addicting, and I ended up making customizable binders to go with both of these Teacher Binder themes, and just for fun, I also made a spiral notebook too!
 They are high-quality Avery binders custom printed to match the theme of the binders. These are printed directly onto the vinyl and are customized with your name. My Rainbow Honeycomb Binder is on its way to me as we speak, and I can't wait for the package to arrive!
Pop over to both of these great linkies to snag some more great deals and check out some Tried-it's!

Today's Two for Tuesdays are two of my Teacher Binders...
One is brand new, and the other has been given a total face-lift with a clean, fresh, & modern design! Both are editable and include editing/printing tips. They include organizational forms, calendars, planning pages, grade & attendance sheets, student information, parent contact info, a multitude of binder dividers, and more!Here's a peek at what's inside... In the interest of keeping this short-ish, I'm just posting a little bit of each one. The overall binder is the same though, so if you see it in one set, it exists in the other one too. Download the previews on TPT to see a peek at every page!
Brand new: Rainbow Honeycomb Teacher Planner
Just updated: Turquoise Dots Teacher Planner
Both of these are on sale today only for just $5 each! Get a jump on next year's organization by grabbing one now!!
Here's my Tried-it for this week...
I am super excited about this one! I decided I wanted a custom printed binder for my teacher binder this year instead of just printing covers to slide into the sleeves of some plain binder. So I headed over to Zazzle to create one, and I found it wasPop over to both of these great linkies to snag some more great deals and check out some Tried-it's!